With Ning 3.0, you can create multiple instances (copies) of the Forum feature. This means that you can create one Forum instance to which all of your members are able to contribute discussions, and that anyone (be they a member or a non-member) can read. You can also create a second Forum instance that only members can view, but only administrators can create discussions in.
In this way, you have fine-grained control over who can contribute and view forum discussions on your network. You can create as many Forum instances as you want.
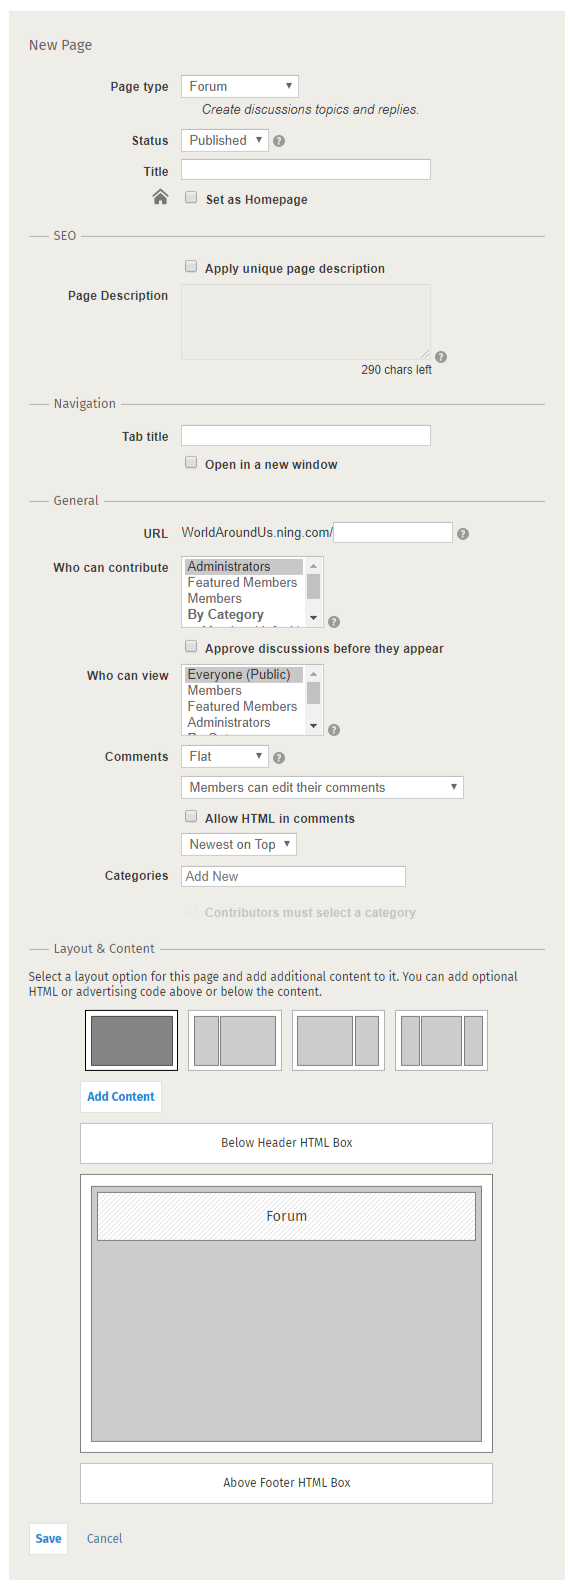
To create a Forum instance, go to the administrative toolbar and click on the Social Site Manager icon. From this page, click on the “Site & Pages” link and then click on the “Add a Page” button. From the “Page Type” drop-down menu, select “Forum”.
You can click on the “Add a Page” button under the Main Navigation section to have a tab display in the navigation menu for this Page Type.
If you don’t want to create a navigation tab for this Page Type, add your page under the Unlinked Pages section of the Site and Pages section.
When naming your forum in the “Title” field, the navigation tab title and the URL will by default auto-populate with this same name. If this name is edited at a later time, only that specific field will change.
To further organize your discussions within this forum instance, add categories. See “Manage Forum Categories” for more information.
Privacy of Your Forum Instance
Set your forum’s status to “Published” to make this instance live and accessible to those you’ve specified. Or, if you only want this instance to be accessible to you and administrators you’ve appointed, save it as a “Draft”. This setting is also useful for if you are not ready to go public with it yet. Then once you are ready, change the status to “Published”.
You have the ability to determine who can contribute to a Forum instance. Choose “Administrators”, “Featured Members” and “Members” from the “Who can contribute” drop-down menu. Viewing permissions are open to “Everyone (Public)”, “Members”, “Featured Members” and “Administrators”.
For more information on how to have administrators on your network, see “Appoint Administrators”. For more information on featuring members on your network, see “Feature Content or Members on Your Network“.
Commenting
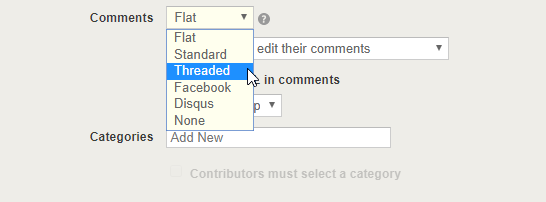
Commenting options are flexible and determined per feature instance. Set whether to have newest or oldest comments appear first. If you want to use the native commenting system offered on the Ning platform, select “Standard”. Members on the network will be able to comment and see each others’ comments (depending on your viewing permissions). If you want to make this discussion more widely accessible, try using a social media service’s commenting system. You can choose between Facebook and Disqus commenting settings.
You can additionally choose to enable your members to add HTML to their comments or turn this off. This option will be turned on by default.
Customize Your Forum Instance
If you’d like to spice up your Forum instance a bit further, incorporate some additional content items by using the “Add Content” button. On indoormusicfestivals.ning.com, we thought it’d be great to add Festival Photos to our Forum Instance all about Music Festivals.
You can choose from four layout options for the Forum page. For layouts with two columns, you can even change the Sidebar Size. Select your size form the “Sidebar size” drop-down menu.
Add text, JavaScript or HTML code to either the Below Header or Above Footer HTML boxes by clicking on the boxes and directly pasting your text or code in the space provided. This is a great space to place a custom ad or incorporate some additional instructions for members on using this Forum Instance.
Moderation of Your Forum Instance
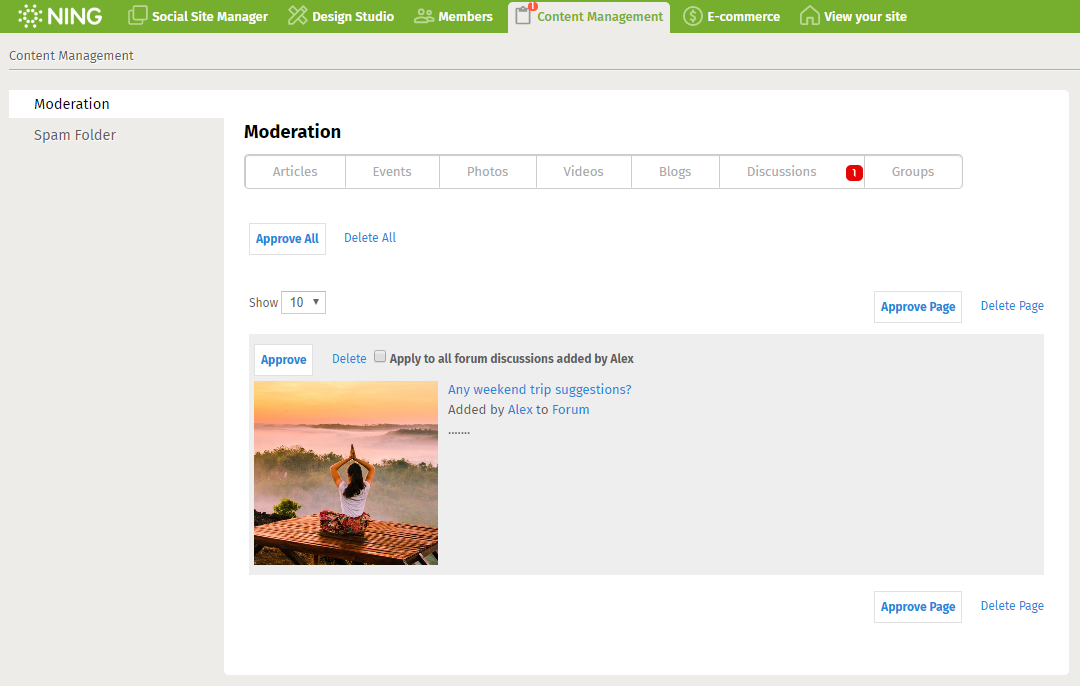
When determining who can contribute, you can also elect to require content approval before a discussion will appear on your network in this forum. This means that when someone (a member or featured member) creates a discussion, they will see a “Pending Approval” lightbox after posting their discussion, and you will see this discussion in the Content Moderation section of your network’s dashboard.
If you approve a discussion, it will immediately show up in the Forum instance. If you delete a discussion, you may want to notify a member that you have done so and why, so that they know what to do next time in order to get their discussion approved.