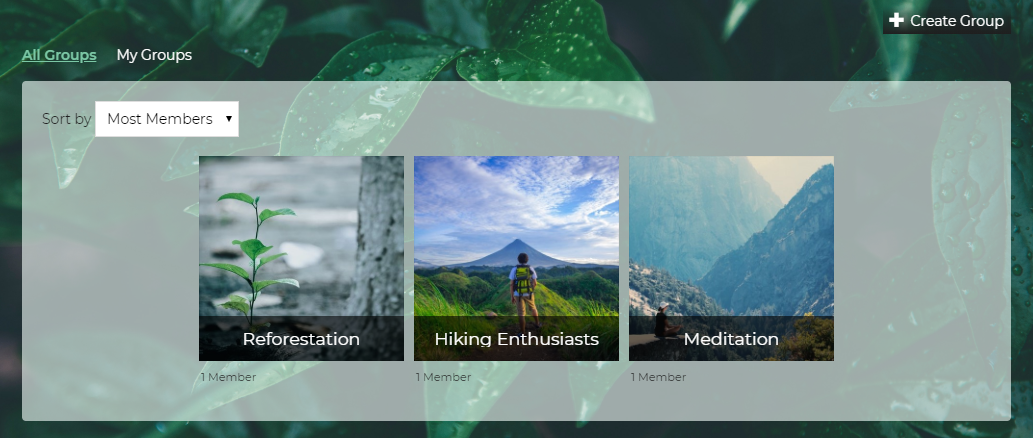
Groups are a great way to increase member engagement and enable members to find other members with similar interests. Groups are also a powerful solution for Network Creators with a business model or community concept based on multiple sub-groups of members. Each group operates almost as a full-featured network or supergroup. You can add multiple instances of features like Blogs, Forums or Photos to each group.
Members can create Groups around any number of topics, such as:
• Country
• Region
• Language
• Album (photo album alternative?)
• Interest
• Book
• Character
• Actor
• Music
• Area of practice
• Pet breed
• Profession
And more! Groups can also be used for mentoring or support groups, to organize offline activities (e.g. a cycling group), private team collaboration, beta testing, focus groups, management of a community and for premium memberships (e.g. a fan club).
When it comes to creating Groups, you get to specify which members are able to add groups and view the Group Hub page whether it be all members, admins, featured members, or a specific member category. We’ve also given you granular controls to specify, whether Group Admins can customize their Group cover photo, features or layout, or message Group members. You can also override these default settings for a specific Group.
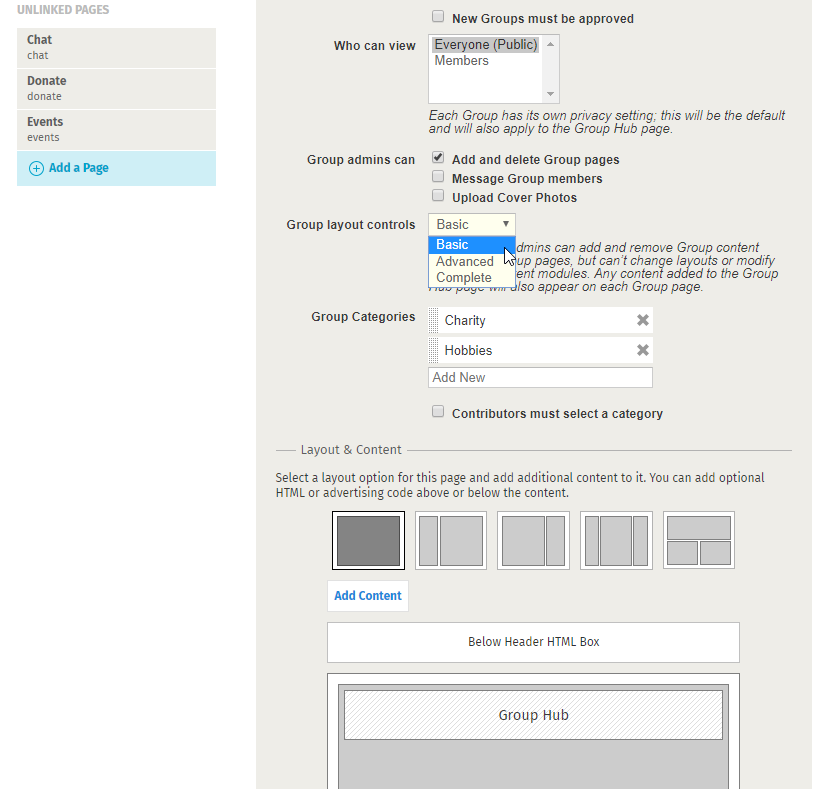
These are the Layout Controls available for your Groups:
Basic: Group Admins can add and remove Group content modules in Group pages, but can’t change layouts or modify non-group content modules. Any content added to the Group Hub page will also appear on each Group page.
Advanced: Group Admins can choose alternate layouts for Group pages and add and remove Group content modules. Content Added to the Group Hub will not appear on Group pages.
Complete: Group Admins can choose alternate layouts for Group pages, add and remove Group content modules and can update the Below Header and Above Footer HTML boxes on Group pages. Content Added to the Group Hub will not appear on Group pages.
Group Privacy
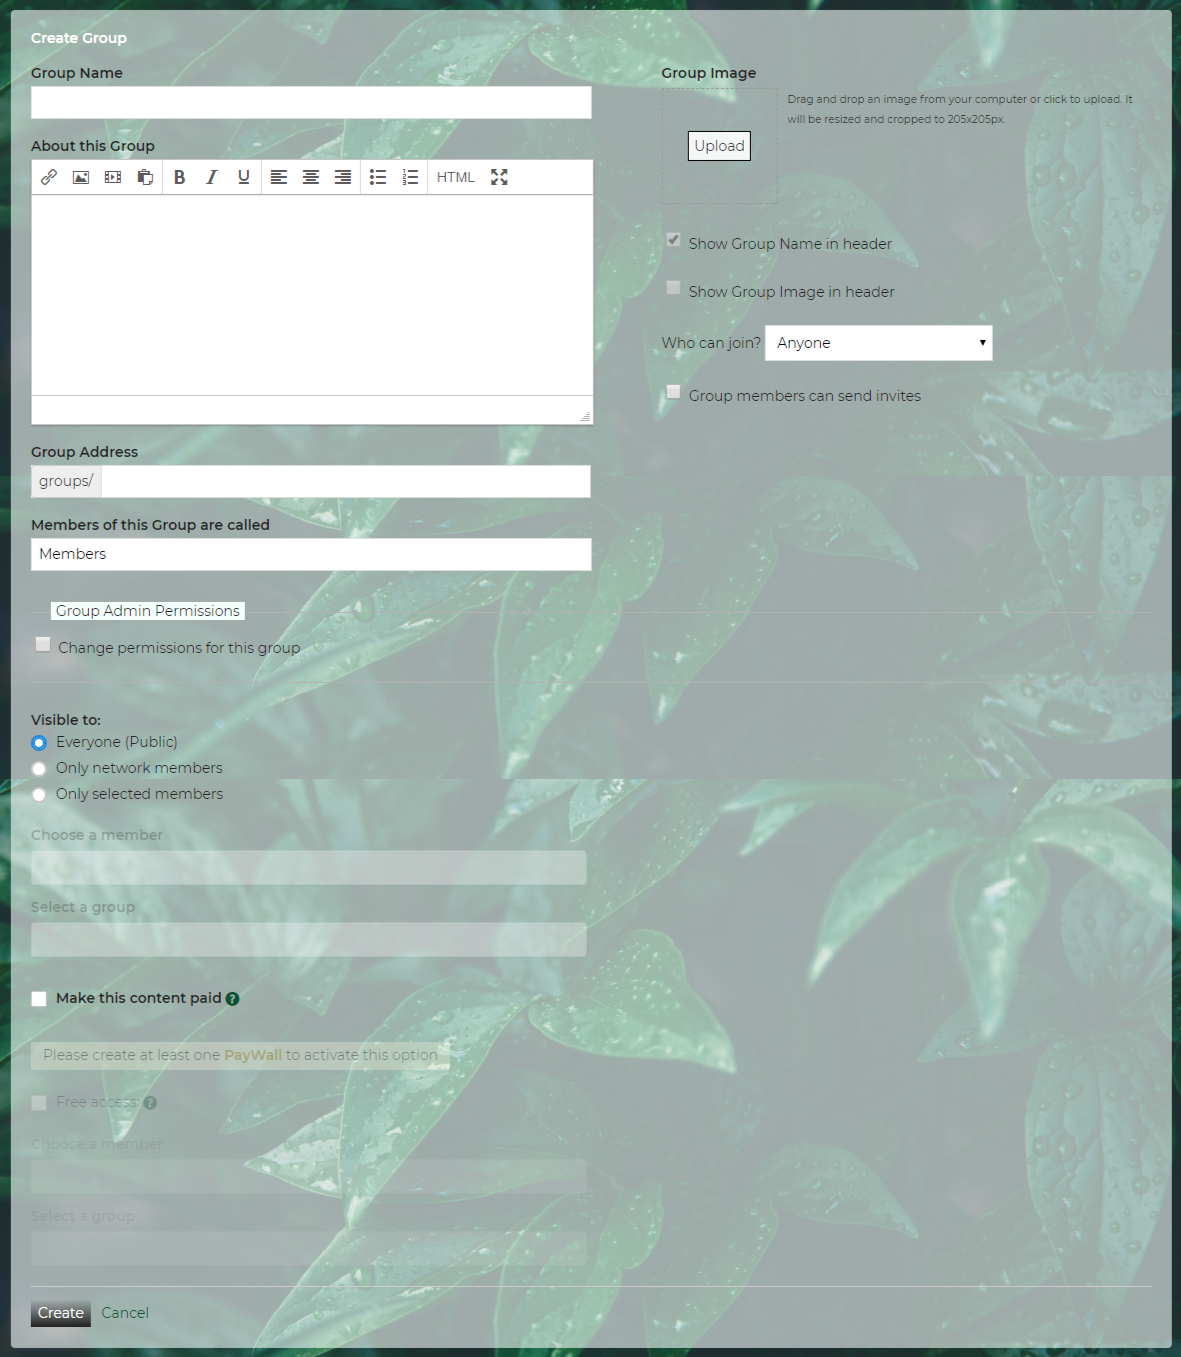
By default, non-members will see an About block. This will contain information about the Group (added by the Group Creator) along with a member count. Each Group creator can also choose the term they’d like to use for the Group’s members. For example, Fans, Members, Artists, Musician, Producers, Concertgoers, etc. The Group creator can also indicate whether the Group is open, invite only or closed.
• An Open Group is one that any network member can join
• An Invite Only Group is one that only invited people can join
• A closed Group is one that is not accepting new members
Group Editing and Management
The group creator or a Network Admin can update the group’s name, description, url, image and cover photo, and join options. They can also add and delete content pages like multiple instances of Photos, Forums, and Blogs and rearrange the group’s navigation menu. Each new group page you create will appear in the All Groups page navigation and you can arrange the order in which they appear by dragging the panels around.
Adding Members
There are several ways to add members to your groups.
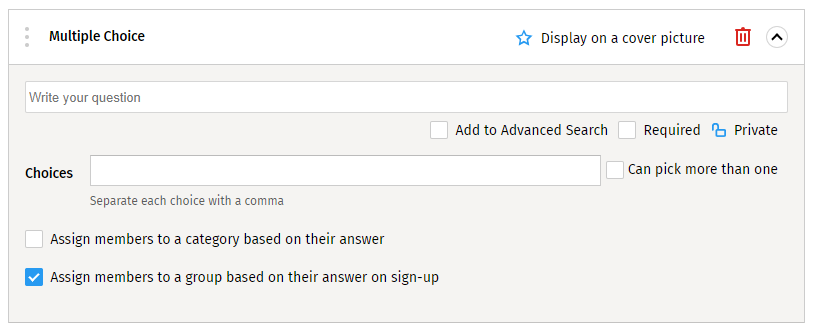
Auto-add via Profile Questions: You can automatically assign members to groups when they sign up based on their response to a profile question. To enable this, head to your Member Management tab on your network’s green toolbar and then select the Profile Questions tab. From here, add a multiple choice question with answers based on your Group Categories. For example, you can have members choose between music genres and then select the radio button next to ‘Assign Members to a group based on their answer on sign-up’. Please note that members can only select one answer when you enable this option.
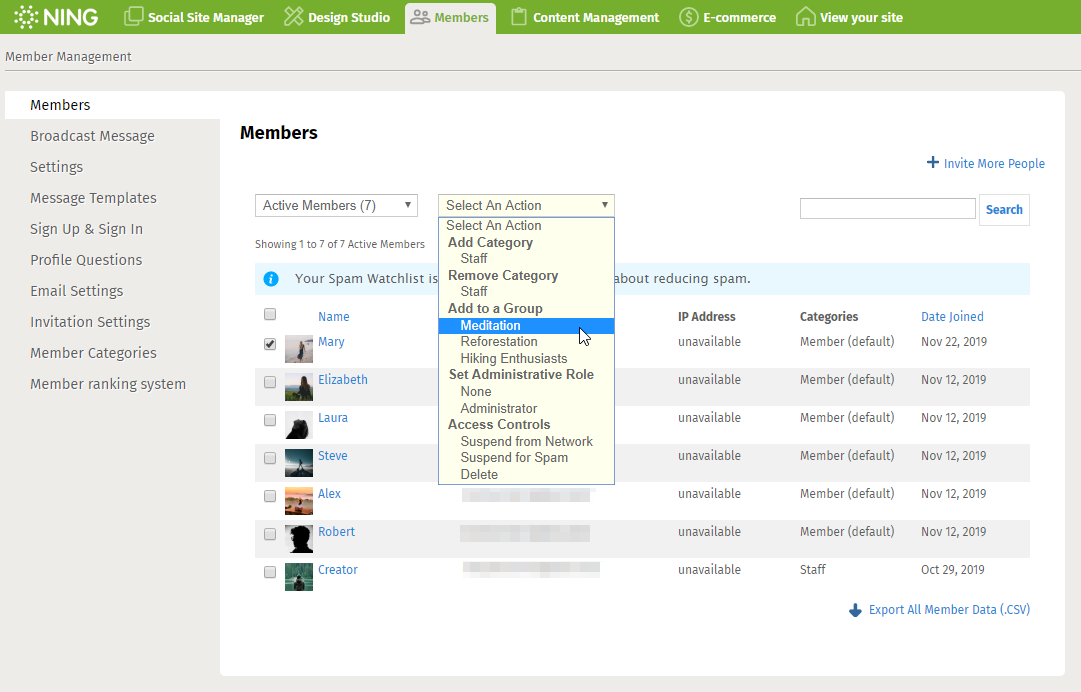
The Network Creator and Admins can also add members to a group using the Member Management facility. Just head to the ‘Members’ tab under the Members Management section and select the members that you’d like to move to a specific group. Then, from the ‘Select an Action’ drop-down menu, you’ll be able to choose which group to add those members to.
When you add members to a specific group they will receive an email notification letting them know they were added.
Invitations:
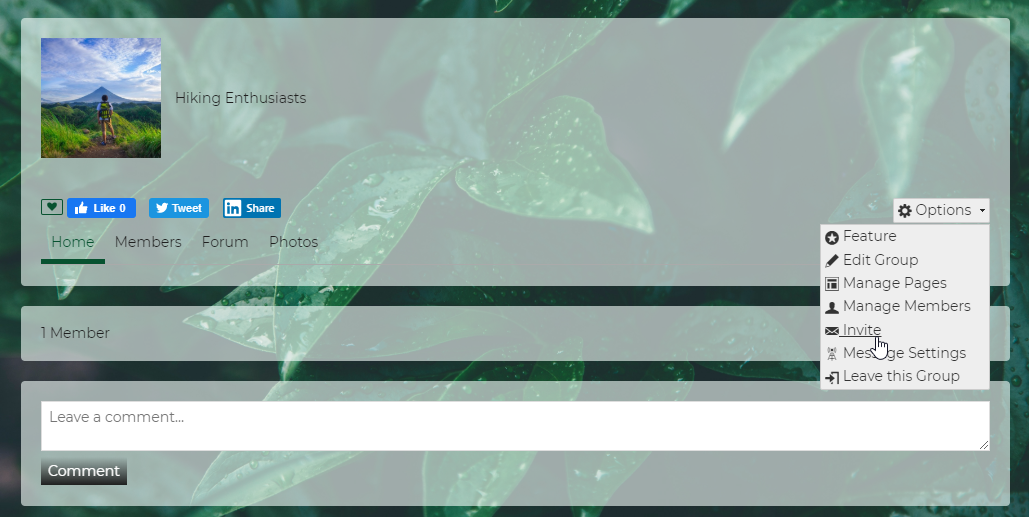
To invite people to your group, click on the “Group Options” button from the group’s detail page. Select “Manage Members” from the drop-down menu. This will take you to your network’s Member Management page. From here, you can send a message to your members and invite new people to join your group. Click on the “Invite People” link. An input field will display. Enter email addresses of desired invitees, or enter the names of friends on the network. Entering a friend’s name will cause an invitation to the group to be sent to the member who matches that name.