To enable users to sign up to your network with their Google account, you need to create a Google app first. It takes about 2 minutes to set up.
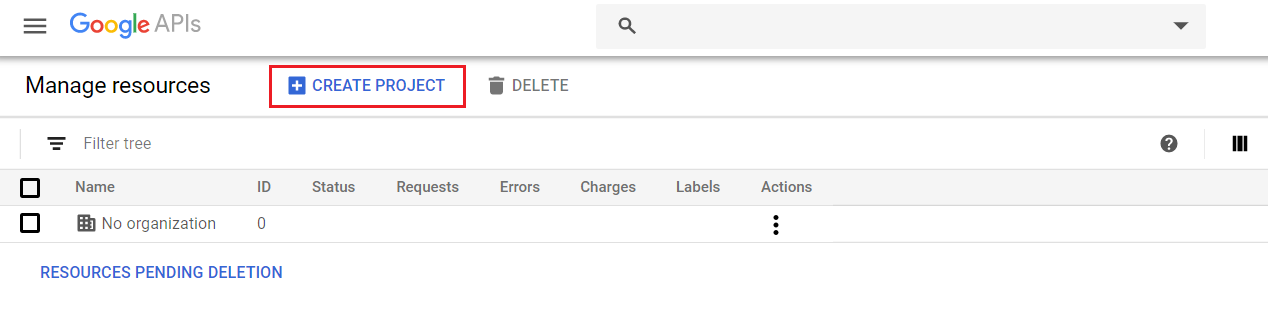
- Go to Google Developers Console and click Create Project.
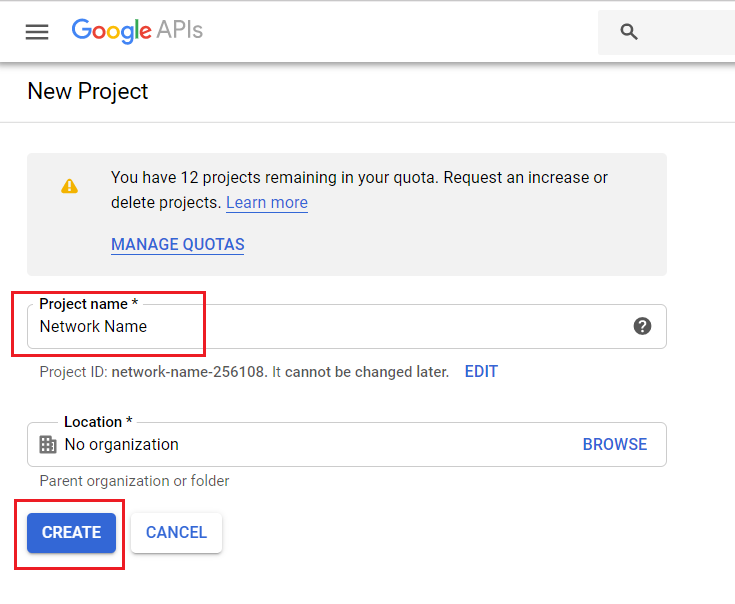
- Enter your project name and click Create.
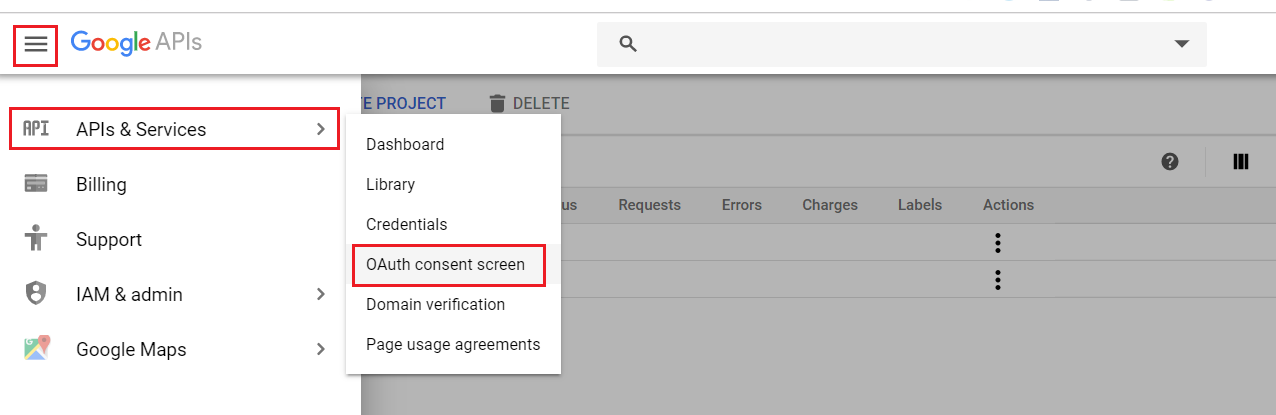
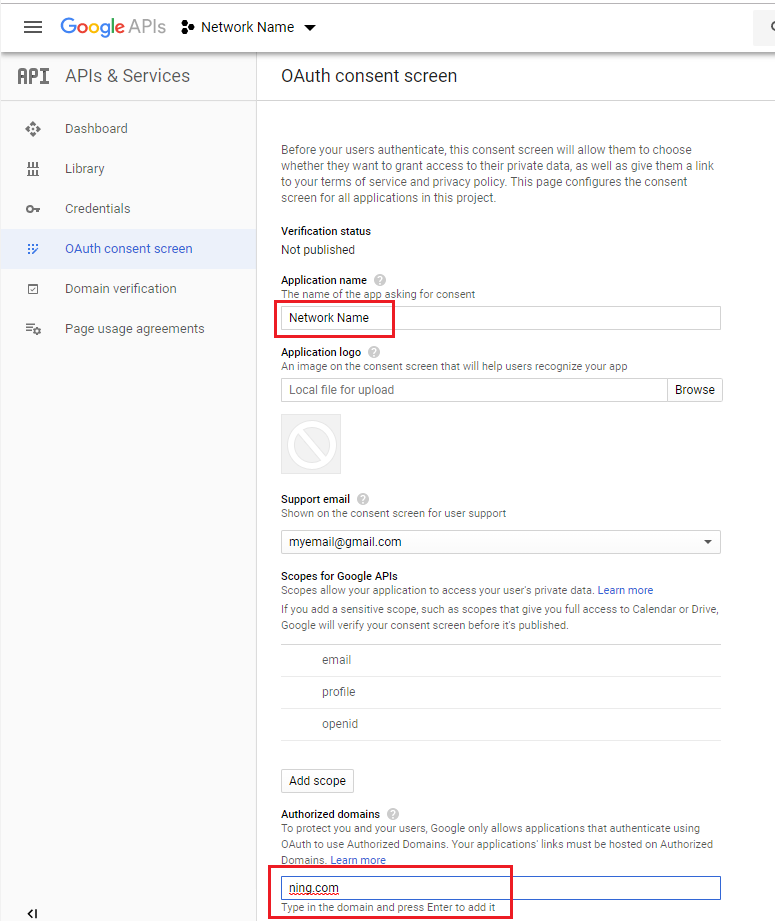
- After successfully creating the project, open the navigation menu and go to APIs and Services > Credentials > OAuth consent screen.
- Add ning.com to Authorized domains and fill in the Application name field.
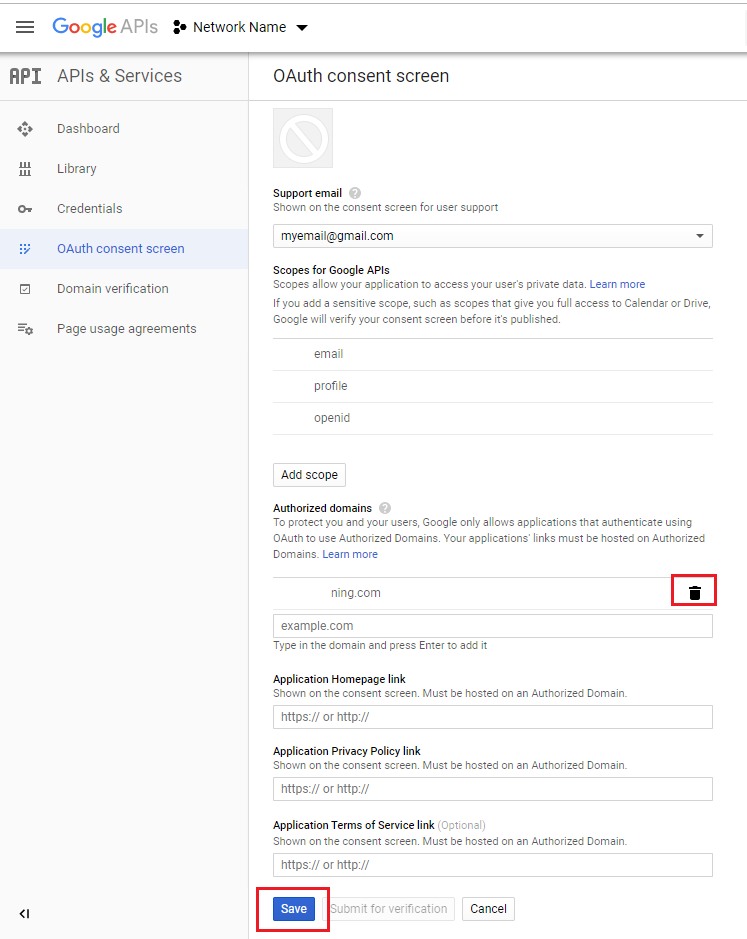
- The basket icon will appear next to the Authorized domains field. Click Save.
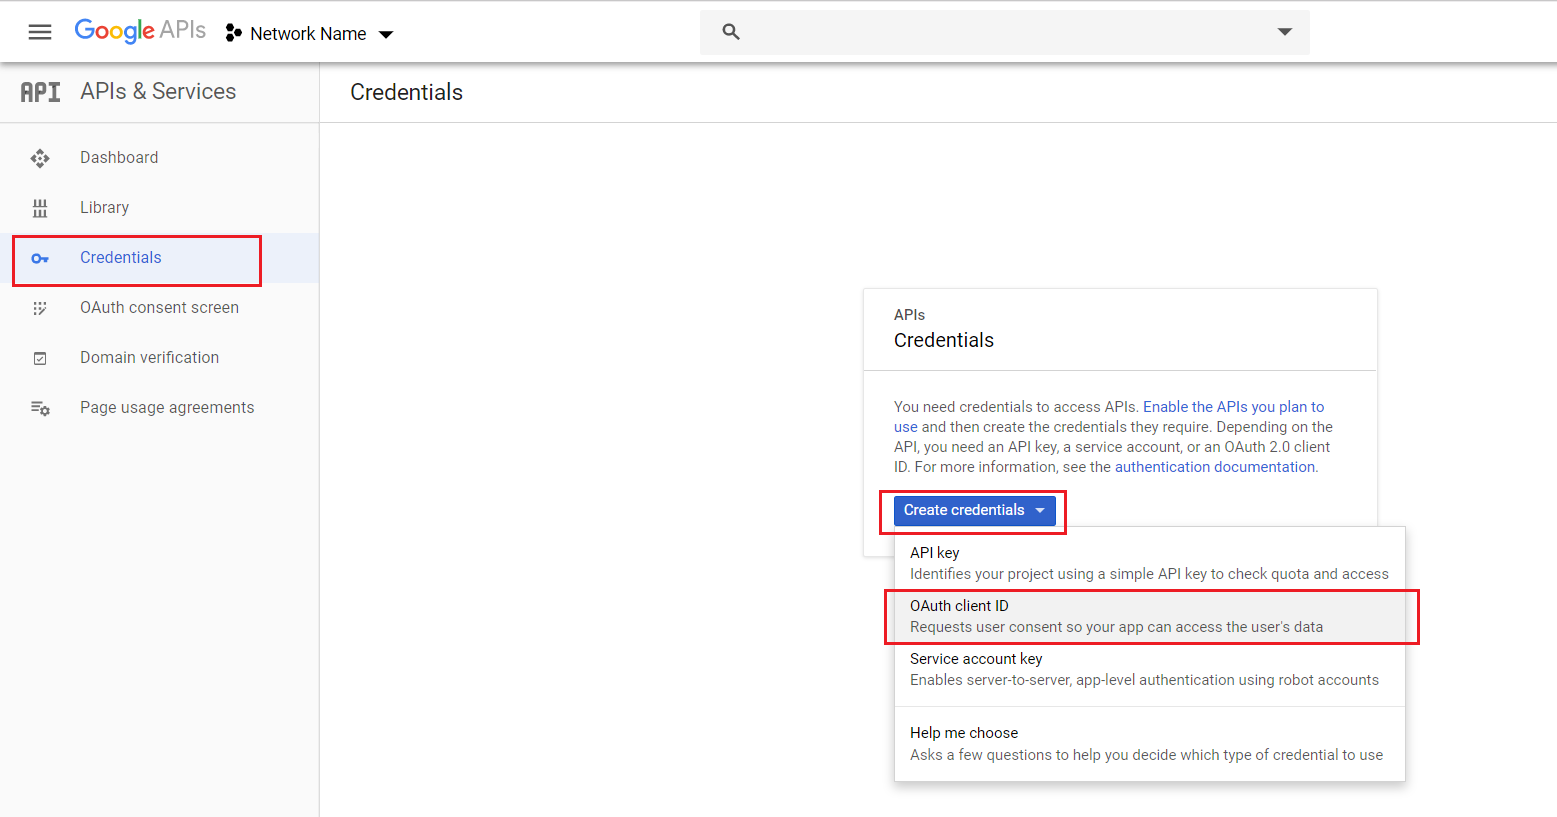
- Open the Credentials tab. Click the Create credentials button and select OAuth client ID.
- Check the Web application box in the Application type section.
- Fill in the Authorized redirect URI field with the following URL: https://auth.ning.com/socialAuth/google
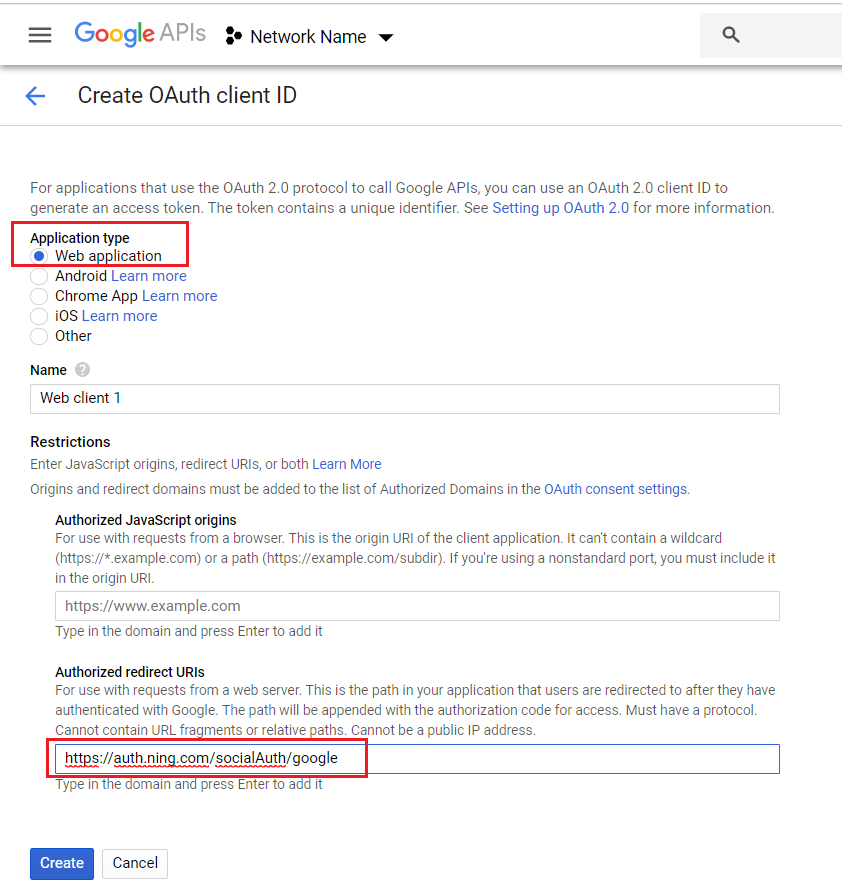
- Click on the Name field. The basket icon will appear next to the Authorized redirect URIs field.
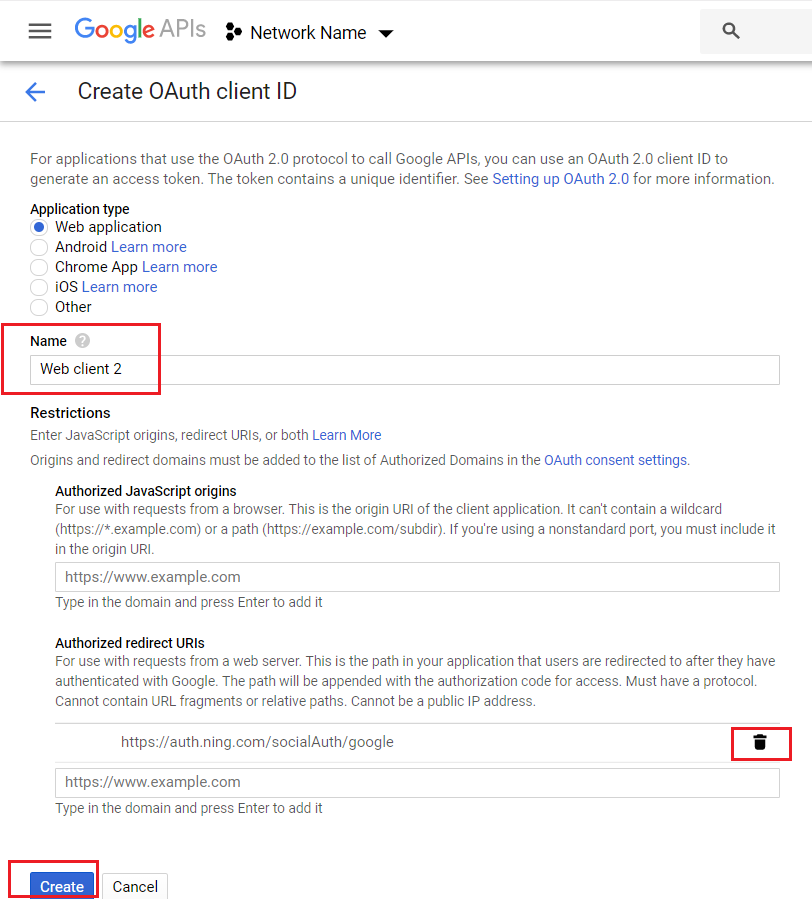
- Click Create. A pop-up with your Client ID and Client Secret will appear. Copy them
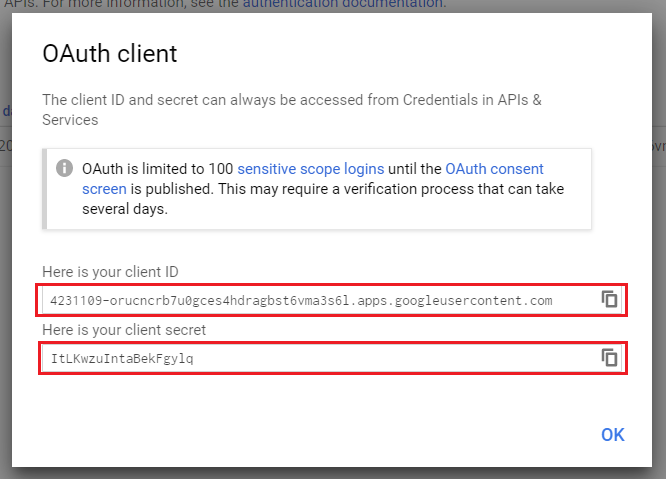
- Paste the Client ID and Client Secret in the corresponding fields of the pop-up that appears in the Sign Up & Sign In page of your NING admin panel.
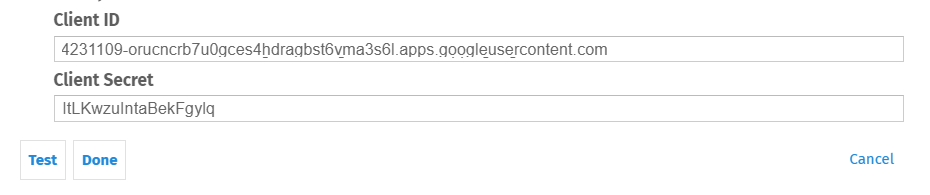
- Click Test.
- In the newly opened window, log in using your active Google account.
- If the settings are correct, a notification will appear, confirming that the test was successful. Click Save to save the settings.

Similar Articles:
- None Found